Roof leaks are one of the most common and disruptive problems homeowners face. Whether caused by aging materials, storm damage, or poor installation, a roof leak can escalate from a minor inconvenience to a costly structural issue if not addressed promptly. Knowing how to repair roof leak damage efficiently is critical for protecting the home and maintaining long-term property value.
Here’s the process of identifying, diagnosing, and fixing a roof leak.
Table of Contents
Key Takeaways
✔ Spot early signs like stains, mold, warped floors, or attic light to catch a roof leak before it worsens.
✔ Pinpoint the exact leak source by inspecting the attic, shingles, flashing, gutters, and using a hose test.
✔ Prepare for repairs by gathering the right tools, safety gear, sealants, and patch kits.
✔ Apply temporary leak control using tarps, roofing tape, or buckets if immediate repair isn’t possible.
✔ Fix common problem areas such as damaged shingles, faulty flashing, cracked vent boots, and clogged gutters.
✔ Maintain your roof by scheduling inspections, trimming overhanging branches, cleaning gutters, and resealing edges.
✔ Call a professional when the damage is widespread, leaks are recurring, or the job is too dangerous to DIY.

1. Identify the Signs of a Roof Leak
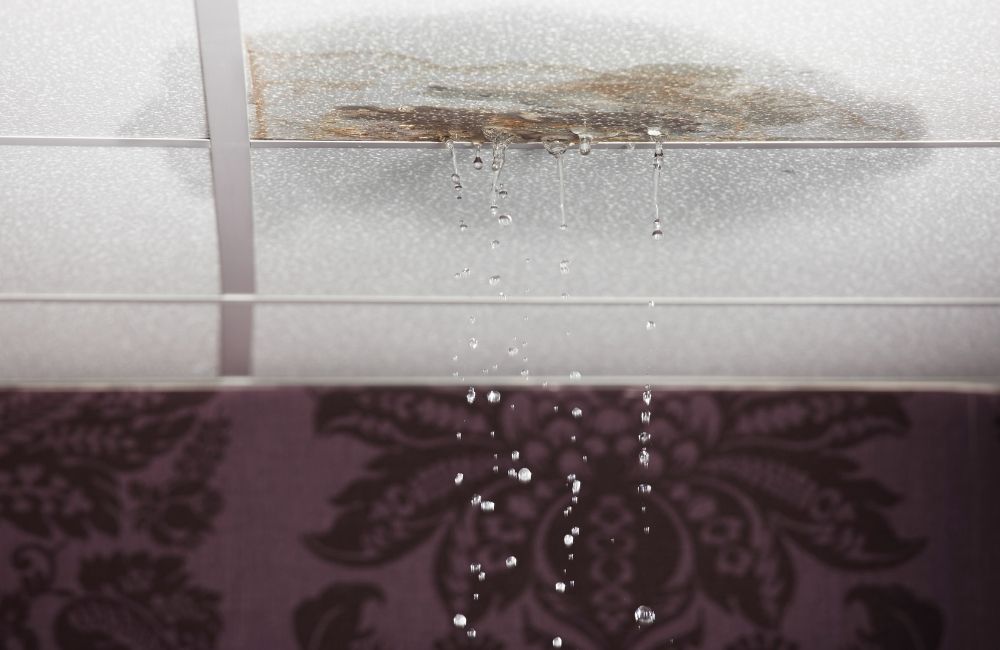
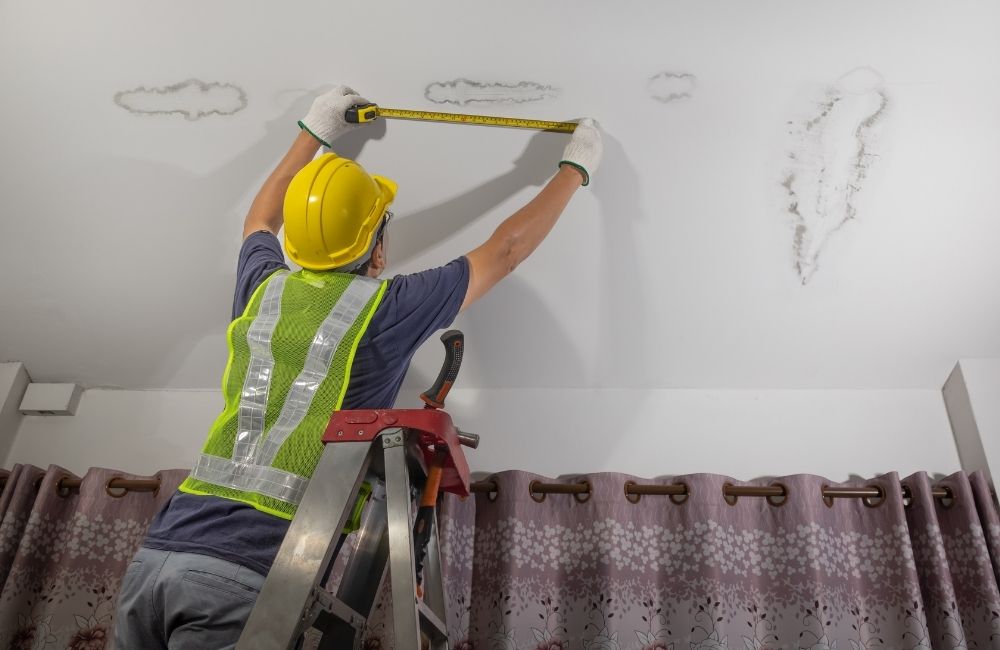
Recognizing the early warning signs is crucial in beginning any leaking roof repairs before serious damage develops. These symptoms often appear inside the home before showing up on the exterior. Spotting these warning signs early makes it possible to begin how to repair roof leaks before the damage spreads further through the home’s structure.
- Water Stains on Ceilings and Walls: Irregularly shaped brown, yellow, or copper-toned patches typically appear after rain and gradually expand. These stains are usually caused by consistent water intrusion.
- Mold, Mildew, or Musty Odors: Persistent moisture from a roof leak creates ideal conditions for mold growth. You may notice black or greenish spots near ceilings or corners, often with a damp, unpleasant smell.
- Peeling or Bubbling Paint and Wallpaper: Trapped moisture behind walls or ceilings can push paint outward or cause wallpaper to bubble and peel, indicating prolonged exposure to water.
- Sagging Ceiling Tiles or Discolored Panels: Ceiling tiles, especially in basements or finished attics, may sag, bulge, or appear stained if the material above them has absorbed moisture.
- Active Drips or Water Puddles Indoors: In severe cases, you might see dripping water during storms or standing puddles below the leak point. This requires immediate attention to prevent further interior damage.
- Warped Flooring Near Walls or Under Attics: When water travels along wall cavities, it can eventually soak into hardwood flooring or carpet, leading to visible warping, staining, or a spongy texture underfoot.
- Spikes in Energy Bills: Wet insulation in the attic loses its effectiveness, causing the HVAC system to work harder. This may result in higher-than-usual utility bills even with normal usage.
- Nail Pops or Drywall Distortion: As wood framing swells from water absorption, it can push nails outward, creating visible bumps or breaks in drywall surfaces.
- Sunlight Visible Through Roof Boards: Small pinholes of light coming through the roof boards in the attic often indicate missing shingles or cracks, both of which are potential entry points for rain.
2. Locate the Source of the Leak
Once signs of damage are noticed indoors, the next step is identifying where the water is actually entering the home. Identifying the exact location allows homeowners to proceed with focused, accurate roof leaking repair rather than guessing. It’s the cornerstone of proper how to repair roof leak planning and avoids wasting time or materials on incorrect areas.
- Interior Inspection (Attic or Crawlspace): Start by entering the attic during daylight or just after rainfall. Look for damp rafters, stained wood, and compressed or soggy insulation. Water trails often run along framing before they appear as ceiling stains.
- Exterior Surface Check: From the ground or using a stable ladder, scan the roof for missing, cracked, or curled shingles. Even a single damaged shingle can expose the roof deck to water entry.
- Inspect Flashing and Roof Penetrations: Chimneys, skylights, and vent pipes are common problem areas. Flashing that is loose, rusted, or pulling away from the surface can allow rain to seep underneath. Rubber boots around vents can also crack over time and compromise waterproofing.
- Check Satellite Dishes or Mounted Fixtures: Any equipment mounted on the roof, such as solar panels or antennas, may have damaged the shingles during installation or may no longer be sealed properly, making them vulnerable points for leaks.
- Examine Gutters and Downspouts: Clogged or overflowing gutters can force water back onto the roof, especially near the eaves. This leads to damage at the roof edges and under the shingles.
- Perform a Hose Test: When the source is not obvious, enlist a helper. One person sprays water on sections of the roof while the other watches inside for leaks. This process helps narrow down the entry point and is especially useful for intermittent leaks.
- Inspect After Heavy Rain or Wind: Storms can reveal or cause vulnerabilities. Even small windstorms can dislodge shingles or expose pre-existing weak points, so it’s wise to perform a thorough check after any significant weather event.
3. Gather the Tools and Materials You’ll Need
After identifying the leak, the next step in any roof leaking repair is proper preparation. Using the right equipment ensures both safety and efficiency while working on the roof. Being equipped with these tools allows homeowners to handle most minor leaking roof repairs safely and effectively. For larger issues, however, more advanced tools and hiring licensed professional help is the best foot forward.
Safety Equipment
- Sturdy Ladder: A high-quality ladder is essential for safe roof access. Choose one with a wide base, slip-resistant feet, and a load capacity suitable for both the worker and their tools.
- Roof Harness: Fall protection is non-negotiable when working on sloped or elevated surfaces. A full-body harness with a secure anchor system significantly reduces the risk of injury.
- Work Gloves: Gloves protect against sharp shingle edges, nails, and other abrasive materials. They also improve grip when handling tools or slippery components.
- Rubber-Soled Shoes: Proper footwear with excellent traction helps prevent slips, especially on steep or wet roofing surfaces.
Basic Tools
- Utility Knife: A sharp knife is necessary for cutting roofing materials, underlayment, or sealant packaging. It’s also useful for trimming shingles to size.
- Hammer or Nail Gun: For driving roofing nails quickly and securely. A nail gun is more efficient for larger repairs, while a hammer suffices for single-shingle replacement.
- Caulking Gun: Used to apply sealants or roofing adhesive precisely, especially around flashing or vents where waterproofing is critical.
- Pry Bar: Essential for lifting damaged shingles, removing nails, and accessing layers of roofing material without causing further damage.
Repair Materials
- Roofing Nails or Screws: Corrosion-resistant fasteners are ideal for attaching shingles or flashing securely. Always use roofing-specific nails to ensure weather resistance.
- Roofing Cement or Sealant: A thick, adhesive paste used to seal cracks, gaps, or joints. It creates a weatherproof barrier, often around seams and edges.
- Replacement Shingles: Matching the existing shingle type ensures uniform appearance and structural continuity. Always keep a few spares on hand after a new installation.
- Roofing Tape or Membrane: These self-adhesive products provide fast waterproofing for seams or small cracks. They’re especially useful during emergency repairs or in flat roof sections.
- Waterproof Patch Kits: Designed for small punctures or splits, these kits contain everything needed for a quick, temporary roof leak fix without replacing full sections.
4. Perform Temporary Leak Control (If Immediate Repair Isn’t Possible)
There are times when weather conditions, time limitations, or material availability delay full water leak roof repair. In such cases, temporary fixes can help minimize water intrusion and prevent interior damage. These temporary solutions are not substitutes for long-term repairs, but they provide valuable time to gather materials or wait for weather conditions to improve. They also help limit structural and cosmetic damage while planning a complete roof leak fix.
- Cover with a Tarp: Use a heavy-duty waterproof tarp to shield the damaged section of the roof. Secure it with wood strips and roofing nails to prevent wind uplift. Ensure the tarp extends at least 3 feet beyond the leak on all sides to divert rainwater effectively.
- Apply Roofing Tape: For small cracks or compromised seams, roofing tape provides a fast adhesive seal. It sticks best to dry, clean surfaces and is ideal for flat areas like vent boots or metal flashing.
- Use Roofing Cement for Spot Repairs: Apply roofing cement directly over small holes or gaps, particularly around flashing and joints. It forms a thick seal that can withstand rain until permanent roof leaking repair is possible.
- Set Up a Bucket or Drain Pan Indoors: Place a container under active drips to catch water and reduce damage to flooring or furniture. If possible, drill a small drainage hole in the ceiling drywall to control where water exits, then patch it later.
- Create a Moisture Barrier with Plastic Sheeting: Inside the attic, hang plastic sheeting below the leak and direct the water into a bucket. This protects insulation and framing from saturation.
- Use Towels or Fans to Minimize Interior Moisture: Drying out wet areas quickly reduces the risk of mold growth and additional repairs. Use fans or dehumidifiers if the space becomes damp.
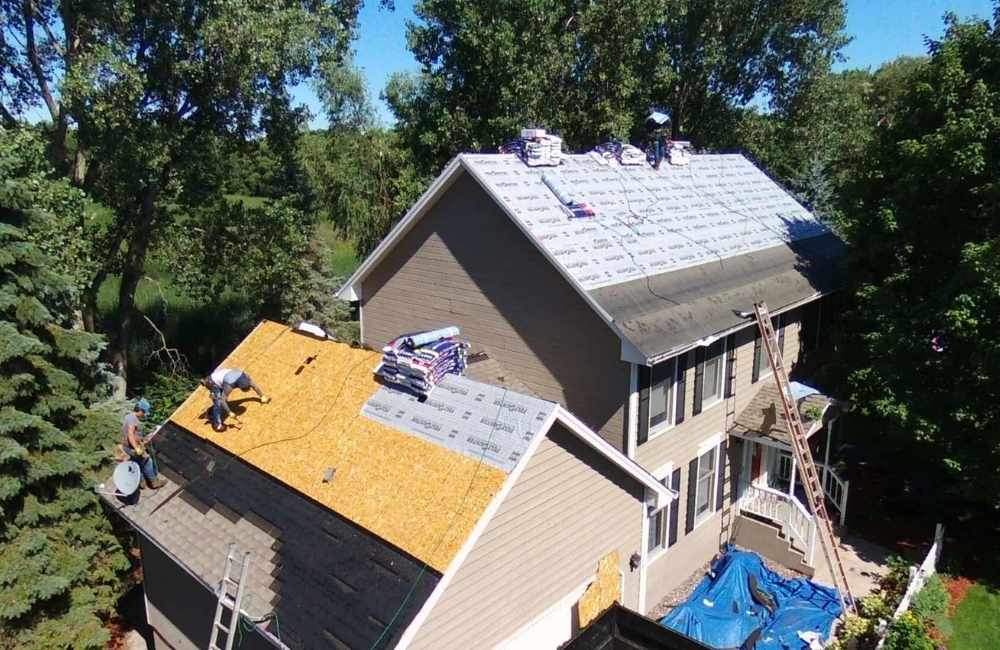
5. Repair Common Roof Leak Areas
Knowing how to repair roof leak issues starts with understanding which components are most likely to fail. Focusing on these common problem spots ensures an efficient repair.
Damaged or Missing Shingles
High winds, hail, age, and poor installation are common reasons shingles come loose or go missing, leaving the roof vulnerable.
- Remove any loose nails or fragments from the damaged area to avoid interfering with the new shingle.
- Slide the replacement shingle into position, ensuring it matches the existing layout.
- Secure it with roofing nails, driven just above the tar line.
- Apply roofing cement along the shingle edges to create a water-resistant seal.
Leaky Flashing
Flashing is typically found around roof features like chimneys, skylights, and wall joints. It prevents water from entering where roofing materials meet vertical structures. Flashing failures are a major source of roof leak issues and should always be inspected carefully during any repair.
- Remove old, damaged flashing using a pry bar without tearing nearby shingles.
- Clean the installation area to allow the new flashing to sit flush against the surface.
- Install new flashing, overlapping it with shingles above and tucking it beneath those below.
- Seal seams and nail heads with roofing cement or caulk for added water resistance.
Cracked Vent Boots or Seals
Vent boots are designed to create a watertight seal around plumbing vent pipes. Sun exposure and weathering can cause them to deteriorate. Failing vent boots are a subtle but frequent cause of hidden roof leaking repair needs.
- Inspect the vent boot for cracks or brittleness, especially at the base where it meets the roof.
- Use a pry bar to remove old fasteners and boot material carefully without damaging the surrounding shingles.
- Position the new boot so that it slides over the pipe and tucks under the shingle row above.
- Nail the flange in place and apply sealant around the edges and pipe penetration.
Clogged Gutters and Downspouts
Gutters are responsible for moving water safely off the roof. When blocked, they overflow and allow water to back up under roofing materials. While not directly part of the roof surface, gutters play a critical role in water leak roof repair prevention and should not be overlooked.
- Clear out all debris, including leaves, twigs, and dirt, particularly at downspout openings.
- Inspect downspouts to ensure they’re not blocked and are properly aligned to direct water away from the foundation.
- Consider installing gutter guards to reduce the frequency of clogs and improve flow consistency.
6. Prevent Future Leaks with Regular Maintenance
The cost of roof repair can be high due to several factors, including the size of the leak, its location, and the type of roofing material involved. A solid maintenance plan minimizes the chance of leaks and reduces the frequency of costly leaking roof repairs. Proactive upkeep significantly reduces the likelihood of a serious roof leak and extends the roof’s overall lifespan.
- Schedule biannual roof inspections in spring and fall. Look for granule loss, cracked sealant, or displaced shingles.
- Trim back overhanging branches to reduce the chance of debris buildup and physical damage from rubbing limbs.
- Clean gutters and downspouts regularly, especially after storms or during fall when leaf drop is heavy.
- Reapply sealants or caulking as needed, particularly around vents, flashing, and chimneys. Check for shrinkage or peeling.
- Watch for signs of ice damming in winter, especially near eaves. Install heat cables or improve attic ventilation and insulation to prevent future issues.
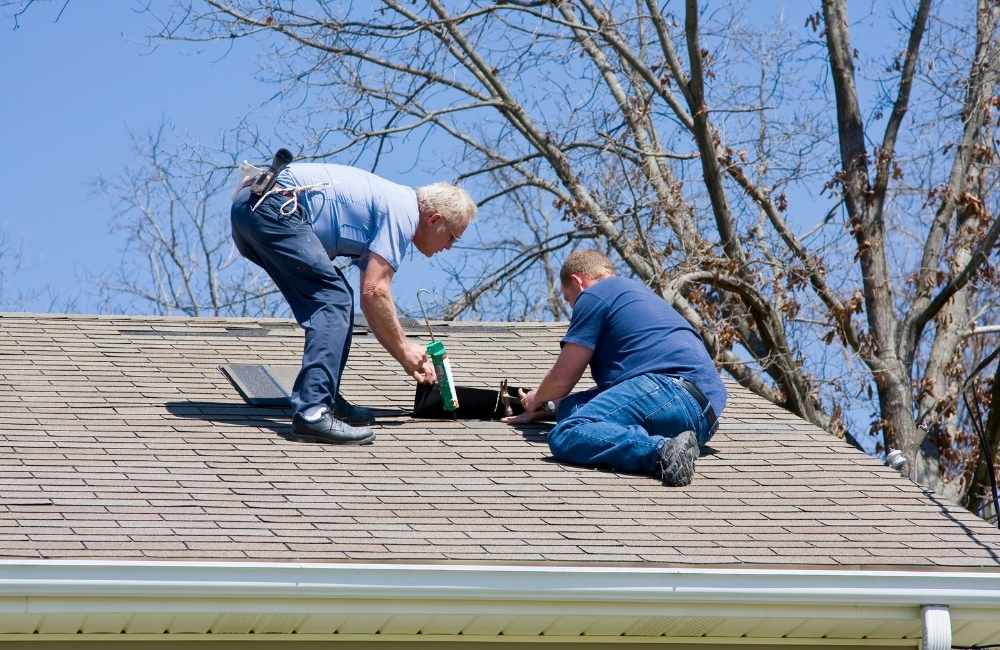
7. Know When to Call a Roofing Professional
Persistent leaks are a leading cause of roof replacements, with 33% of homeowners citing them as the main reason for getting a new roof. While DIY repairs can be effective for minor issues, some situations require expert intervention to ensure proper water leak roof repair and safety. In situations that exceed skill or safety limits, professional service ensures roof leaking repair is handled efficiently and correctly the first time.
- Call a professional for widespread damage, especially if large portions of shingles are missing, or water has reached the roof deck and framing.
- Contact an expert for recurring leaks, which may indicate deep-rooted issues like improper installation or hidden structural problems.
- Avoid DIY if the roof is steep, tall, or slippery, as the risk of falls and serious injury increases significantly.
- Use a licensed roofer when filing insurance or warranty claims, since documentation and professional repairs are often required for coverage.
Frequently Asked Questions
What is the best solution for roof leakage?
The best solution depends on the cause of the leak. For minor issues, roofing cement, sealant, or patch kits can provide effective temporary or permanent fixes. For larger or structural problems, professional repair or partial roof replacement may be necessary.
How to repair a leaking roof without replacing it?
You can fix a roof leak by sealing cracks, replacing damaged shingles, or reinforcing flashing. Use roofing cement, waterproof tape, or patch kits for localized damage. As long as the overall roof structure is sound, a full replacement isn’t required.
Does homeowners' insurance cover roof leaks?
Homeowners insurance typically covers roof leaks caused by sudden events like storms, hail, or falling debris. It does not usually cover leaks from wear and tear or lack of maintenance. Always check your policy details or contact your insurer for specific coverage.
Does Flex Seal work on roof leaks?
Flex Seal can provide a temporary fix for small roof leaks on dry, clean surfaces. It sprays on as a liquid and forms a flexible, rubber-like seal. However, it’s not a long-term solution for major leaks or structural damage.
How do I stop my roof from leaking in heavy rain?
Quick fixes include covering the area with a tarp, applying roofing tape, or sealing visible gaps with roofing cement. Placing buckets or drain pans inside helps manage interior water. Once the weather clears, inspect and perform permanent repairs.
Stop Roof Leaks Fast—Call Roofer of Pleasant Valley Today!
If you’re dealing with roof leaks, don’t wait for the damage to worsen. Roofer of Pleasant Valley offers trusted, professional roofing services for Pleasant Valley, NY, residents. With over 20 years of experience and emergency service, Roofer of Pleasant Valley is the go-to expert for reliable repairs.
Whether you need shingle replacement, flashing repair, or a full roof inspection, Roofer of Pleasant Valley is fully licensed and insured to handle all your needs. Proudly serving Pleasant Valley, NY, our team is known for fast response times, honest pricing, and top-quality workmanship.
Schedule a free estimate with Roofer of Pleasant Valley and protect your home today!